The Swarovski crystal train set was designed by Gabriele Stamey and introduced in 1988 as part of the “when we were young” theme. The locomotive and individual wagons are now very collectible but have often suffered minor damage – mainly due to the failure of the adhesive,
Attaching broken crystal parts like wheels is not rocket science but there are important tricks to a perfect repair that are revealed in this post from the crystal repair experts at Artistry in Glass.
To fix a Swarovski crystal train set: clean & remove old glue, hold the wheels in place with modeling clay, then apply glue and cure with UV light or sunlight.
The Swarovski crystal train set
Our crystal train set comprises four pieces – a locomotive, a petrol wagon, a tipping wagon, and a wagon carriage – connected with silver-tone hooks/hitches. These pieces are all acid-etched with the Swarovski swan maker’s mark.
Jump to this section to learn more about the types of crystal train sets released by Swarovski:
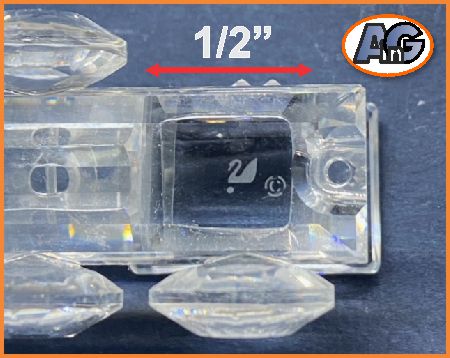
These beautiful components were produced at various times between 1988 and “retired” in 2004. They were issued individually and also as sets that sometimes included mirrored bases (with etched railroad tracks).
Swarovski crystal train sets are very popular – as “cross-over” items they appeal to both crystal and railroad collectors. Individual rail cars realize prices of $50 to $150 each on the resale market (with original box and certificate of authenticity).
However, dating from the 1990s, many sets have come apart due to the failure of the adhesive. Read this amazing post for all you need to know about fixing your broken Swarovski crystal train set.
Artistry in Glass is not endorsed, sponsored, licensed by, or affiliated with Swarovski AG in any way. Follow this link to reach the official Swarovski website.
As an Amazon Associate, I earn from qualifying purchases
Repairing a Swarovski crystal train set – examine the damage
Step #1 in all repairs is to inspect your crystal and identify the 3 types of damage:
- Detached parts caused by failed adhesive. – can generally be restored.
- Broken-off parts (tails, tusks, etc,) – can often be restored.
- Damaged parts (chips, “flea-bites” and scratches) – can seldom be restored.
Having decided if a repair is possible – the question becomes should it be fixed? This question is answered in detail in this post from Artistry in Glass.
The bottom line is that detached parts can be glued back together by a competent amateur providing you have a steady hand. We have explained the gluing process for fixing the class mini-mouse figurine in this post, and also for a very popular Swarovski annual ornament in this post.
Follow the advice in this post for the best way to fix a badly damaged crystal train set.
If all else fails – consider buying a “new” train set
Swarovski crystal train sets are available on the resale market and also “as new” from Amazon sellers. Jump to this link for details:
Preparing to repair
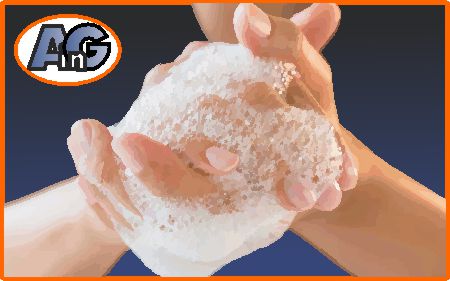
The preliminary step for all repairs is to wash your hands – grease and oils from your fingers will spoil the sparkle of your crystal.
Wash your hands
Remove the old glue and clean the crystal
The next step is to remove the old glue (take note of the facets that had glue – this will help you know how to re-attach the parts).
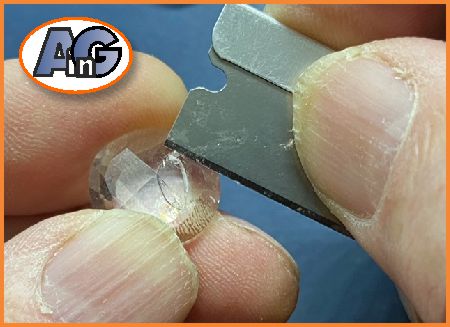
Use single-edge razor blades like these available on Amazon, to remove the failed adhesive. then clean with rubbing alcohol or acetone (these liquids will evaporate leaving no residue).
Complete instructions for cleaning Swarovski crystal are given in this comprehensive post from Artistry in Glass.
UV glues recommended by Artistry in Glass
The Bondic Pro UV Resin Kit comes with a very handy little UV light – perfect for curing small glue joints in Swarovski crystal train sets. Note that for extra strength, we recommend JDiction brand adhesive – below.
“JDiction” brand Ultraviolet epoxy resin crystal clear hard glue cured with UV light or with sunlight. We have tested this to be stronger than the Bondic adhesive for crystal repair.
Analysis of damage to the Swarovski train set
The Locomotive – damage assessment
The Swarovski ” 7471 000 001 / 015 145″ crystal locomotive is a beautiful example of the design skills of Gabriele Stamey. It is composed of no less than 17 individually faceted crystal components, glued together – to form a realistic representation of a classic US locomotive complete with a funnel-shaped smokestack.
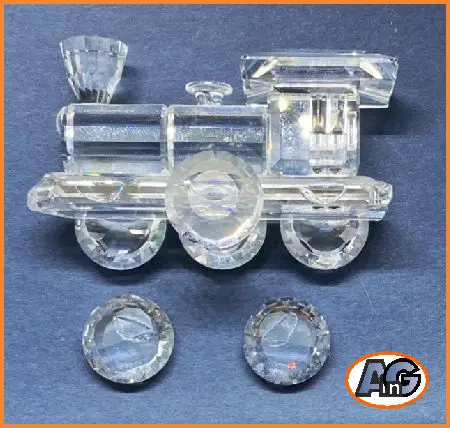
Luckily, the only damage to our locomotive is the detachment of two wheels – these can be re-glued following the instructions below.
For a short video – follow this Youtube link:
Gluing wheels onto Swarovski crystal trains
Gabriele Stamey’s amazing design skills and Swarovski’s careful engineering of the crystal faceting process came together to create a really cool way to attach the wheels to the crystal train wagons. The best part is how precise the angle of the base of the train is, which makes sure that the wheels attach perfectly vertically.

Although the engineering is precise, gluing a loose wheel back into exactly the right spot isn’t simple. If you try to do it by hand, you’ll likely end up with the wheel being too high or too low. Luckily, there’s a trick to make it easier – and we’ve got an animation to show you how it works!
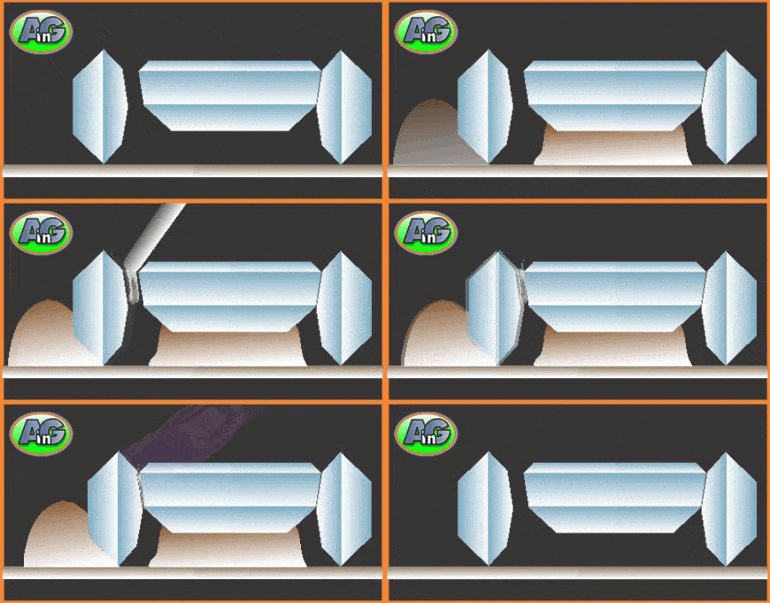
First, you’ll need to mold some modeling clay (we like the Plasticina brand – available here from Amazon): under the train’s chassis on a flat surface (like glass) to make sure it’s the right height above the “ground” level. Then, you can use more clay to prop up the crystal wheel and make sure it’s in the right position.
Before you use any glue, it’s a good idea to do a “dry run” and slide the wheel into place to double-check that everything lines up. Once you’re happy with the placement, – add a little bit of adhesive to the right part of the wheel and slide it carefully into place.
When you are sure everything is lined up correctly, the adhesive should be cured by exposing it to UV light or sunlight.
The Petrol wagon – damage assessment
The Swarovski crystal petrol wagon (” 015 151 /7471 000 004″) in our set is in pristine condition – except that the silver-finish hitch had become unglued.
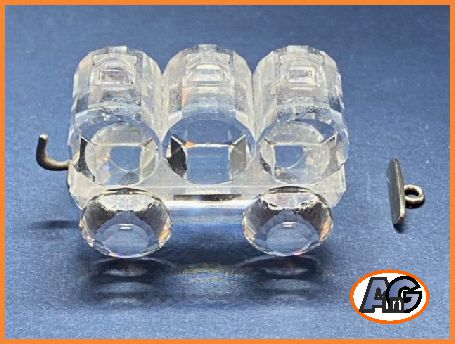
After removing the old adhesive and cleaning the crystal thoroughly, we add a small blob of UV adhesive to the petrol wagon base.
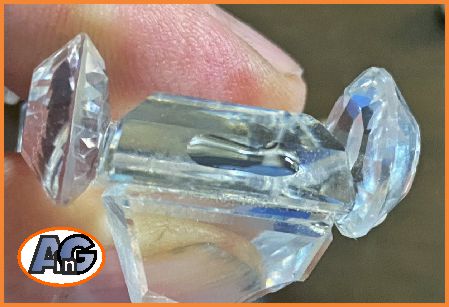
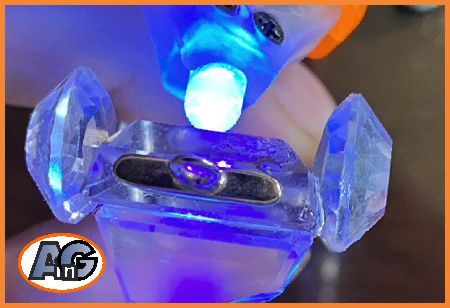
Place the silver connecting hitch in position and shine the UV light onto the back of the crystal to set up the glue. (it only takes a few seconds). (Hold the wagon in a vertical position so the hitch does not slide off.)
The tipping wagon – damage assessment
The Swarovski Tipping Wagon (“7471 000 005 / 171 233”), also designed by Gabriele Stamey
was Introduced in 1990 and retired in 2003. With a current resale value of around $150.00, the tipping wagon is the most valuable component of the train set – probably because its ingenious design allowed the glass tank to rotate on two glass pegs about a horizontal axis.
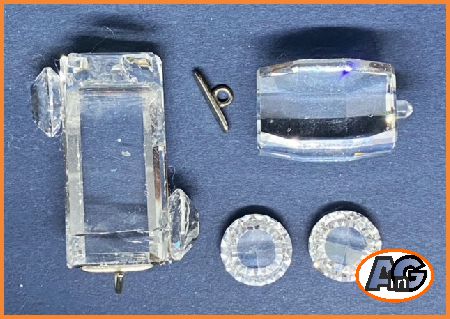
Our unfortunate tipping wagon has been very seriously damaged with the front and back tipping supports broken or missing. Also, only the right-hand tipping peg remains on the tank (see below).
Finally, two of the wheels and one metal hitch are detached.
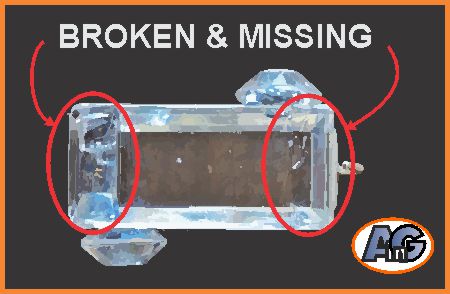
To make matters worse, the wagon chassis shows signs of rough handling in the form of small chips (called “flea bites” in the antique business).
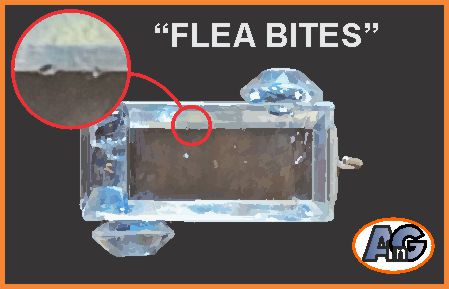
The conclusion has to be that this wagon is officially a write-off – the damaged and missing parts mean that the item has no value. However, our customer requested that we assemble the loose pieces as best we can to partly complete her train set collection.
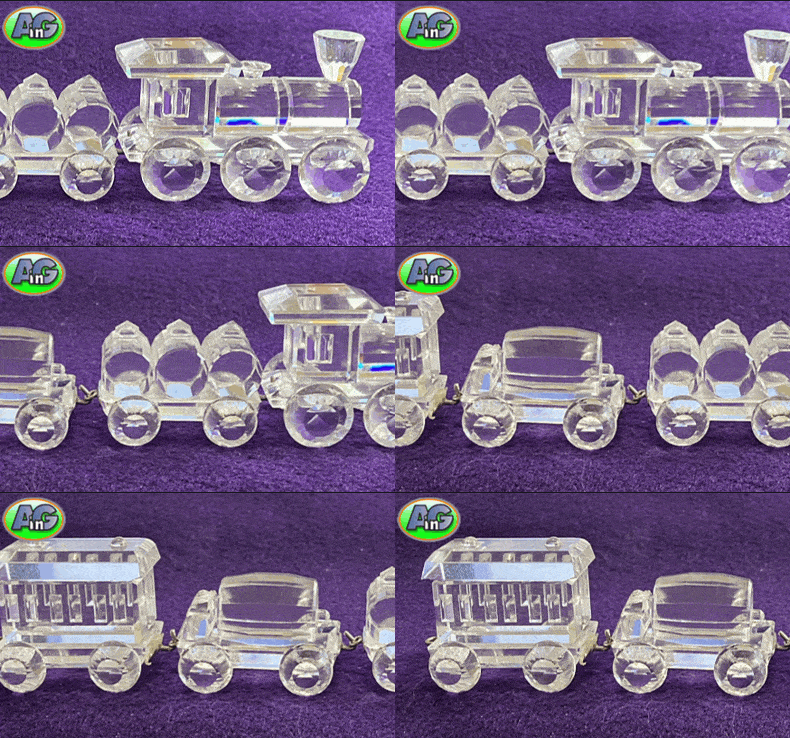
We used the modeling clay leveling method explained above, to attach the wheels and we glued the tank (no longer tipping!) permanently to the chassis.
The wagon carriage – damage assessment
The passenger wagon (called by the European name “carriage”) is Swarovski ” 7471 000 003 / 015 150″. It was introduced in 1988 and retired in 2003 and can be bought on the resale market for around $60.00.
This is a delightfully detailed design with three sets of double windows attached to each side of the carriage. (Swarovski exports actually recognized three varieties of the carriage – each with different window configurations).
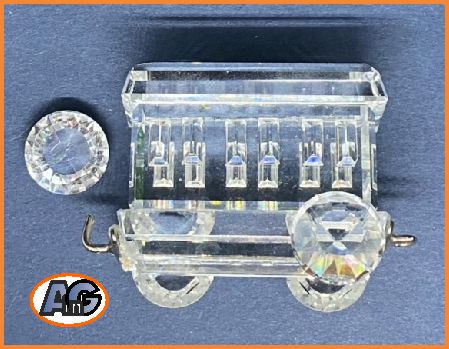
Luckily, the carriage was in pristine condition except for the detachment of one wheel. This was fixed using the molding clay support method described above.
Worth repairing or not?
The important question of whether a broken item is worth repairing depends on several issues
What is the damage and is repair possible
- Detached parts caused by failed adhesive. – can generally be restored.
- Broken-off parts (tails, tusks, etc,) – can often be restored.
- Damaged parts (chips, “flea-bites” and scratches) – can seldom be restored.
Having decided if a repair is possible – the question becomes should it be fixed? This question is answered in detail in this post from Artistry in Glass.
The bottom line is that detached parts can be glued back together by a competent amateur providing you have a steady hand – but follow the advice in this post for best results.
History of the release of train sets
‘Crystal Locomotion’ was a set of 6 trains designed by Gabriele Stamey, as part of the Silver Crystal ‘When We Were Young’ theme group.
The crystal locomotive and wagons were available to purchase separately or as 3-, 4- or 6-piece sets.
The 6-piece set included:
- Locomotive, issued in 2003.
- Tender Car, 2003.
- Wagon Carriage with variations due to how the windows are glued on the box car, 2003.
- Petrol Wagon, 2002,
- Tipping Wagon 2003 and
- Tank Wagon 2003
The set of 3 consisted of
- Locomotive,
- Tender Car, and
- Wagon Carriage, packaged together in one box, retailing at $305.
The Train Set of 4 added the Petrol Wagon, again packaged together, selling for $400.
The Mini Train is a set of 4, packaged together, which includes a round mirror with a train track painted on it, on a much smaller scale, from the Crystal Memories product line. The set has a locomotive followed by 3 identical cars similar in appearance to the wagon carriage. (See availability from Amazon below)
There is also a mirrored Train Track and a Wooden Train Track, known as the Silver Crystal Express issued in 1995; both were issued to display the trains.
Buying a “new” Swarovski crystal train set
If your treasured crystal train is damaged beyond repair, a replacement can be bought on sites like eBay. (be sure to insist on original boxes and COE to verify authenticity).
Authentic Swarovski Crystal Figurine: ‘Mini Train Set’ Rests on Display Mirror – we are not sure if it comes with a certificate of authenticity but it looks to be genuine.
Authentic Swarovski Crystal Figurine: “Locomotion” Wagon Train Car – Collectible No. 015150 (Retired) Made in Austria
Artistry in Glass was your source for antique repair in Tucson
Check out this amazing selection of informative articles:-
- Where can I get antiques repaired?
- Are broken antiques worth fixing?
- How to fix a broken picture frame
- How to repair a broken china plate
- How to repair a broken china teapot
- How to fix a broken marble slab
- How to repair a broken china coffee mug
- How to repair a 2000-year-old sculpture
- All about repairing stained-glass lampshades
- How to care for your stained glass skylight
- How to repair Dalle de Verre
- Is stained glass worth repairing?
- To repair or toss out?
- Tucson crystal & china repair a division of Artistry in Glass
- What to do with broken antiques
- Is lead crystal dangerous?
- Repairing an antique Mexican statue
- Repairing religious statues
- The history of Swarovski crystal figurines
- How to find the value of a Swarovski Crystal figurine
- Have Swarovski crystal figurines lost value since 2009?
- How to collect Swarovski annual ornaments
- How to display Swarovski crystal figurines
- How to authenticate a Swarovski crystal figurine
- How to display Swarovski annual ornaments
- How to clean Swarovski crystal figurines
- How to repair a Swarovski crystal mouse
- How to repair a Swarovski annual ornament
- How to repair a Swarovski crystal train set
- Fixing broken wine glass stems
- How to clean cloudy glasses
- Why do wine glasses have stems?
- Swarovski Crystal Figurines
- How to repair a chip in a wine glass
- How to fix a scratched glass tabletop
- How to replace a broken patio tabletop
