Swarovski crystal figurines are extremely beautiful but fragile and easily broken. Many vintage figurines break through the failure of glue joints. What should you do if your precious figurine comes apart? Find out how to repair Swarovski crystal figurines in this comprehensive post.
To repair Swarovski crystal figurines – clean off the old glue, apply UV-activated adhesive, position the part, & cure the glue using UV light or sunlight.
Artistry in Glass is not endorsed, sponsored, licensed by, or affiliated with Swarovski AG in any way. Follow this link to reach the official Swarovski website.
Why does a Swarovski crystal figurine break?
Swarovski crystal figurines are inherently fragile and easily damaged by careless handling. The most common damage is the failure of glue and detachment of the parts. The joins fail because of impacts due to rough handling and/or because early (pre-1990s) adhesives were lower quality than modern ones and weaken with age.
This post describes, in detail, how to solve the commonest Swarovski repair problem – the re-attachment of detached pieces. Our first example is in the ear of the classic Swarovski mini-mouse figurine.
Before attempting any Swarovski repair
Remember that if your figurine is new and has broken owing to a manufacturing defect it can be returned to an official Swarovski dealer. (Make sure you have the original box and receipt). Some repairs are also warrantied through the Swarovski Collectors Society (SCS). Assuming that your figurine is not eligible for repair under warranty – then:
Consider these important questions:
- What is the damage?
- Is it worth fixing?
- Am I able to fix it?
What is the damage?
The first step is to clean your figurine and carefully inspect it to assess the damage. Cleaning must be done with great care – read this comprehensive post by Artistry in Glass to learn all about cleaning your Swarovski crystal figurine.
Our extensive experience has identified the following three main categories of damage
- Detached parts caused by failed adhesive. – can generally be restored.
- Broken-off parts (tails, tusks, etc,) – can often be restored.
- Damaged parts (chips, “flea-bites” and scratches) – can seldom be restored.
Is it worth fixing?
We explain how to figure out whether your figurine is worth fixing or not in this comprehensive post.
In brief, if you have a new item, covered by the Swarovski company warranty – then take it to an authorized dealer. If it is of great sentimental value but out of warranty then it’s probably worth fixing.
However, if it is a low-value, non-sentimental item then the cost of fixing will likely be more that the cost of a replacement (even the cheapest appropriate adhesive costs $15.00 +).
Am I able to fix it?
Gluing a detached crystal is not complicated but it does require a delicacy of touch, a steady hand, and good hand-eye coordination.
If you’re not careful, it’s easy to glue the crystal incorrectly, either misaligned or in the wrong position.
So, it’s crucial to be honest with yourself about your abilities. If you have large, clumsy fingers, poor eyesight, or shaky hands, it’s advisable to leave the repair work to a professional.
Confident that you are up to the challenge? Read on to learn how!
As an Amazon Associate, I earn from qualifying purchases
How to repair a Swarovski crystal figurine – mini-mouse
Preliminary steps
Before starting any repairs the first steps are to carefully examine the figures and then do a thorough cleaning.
Examine your figurine for damage
There is no step more important than a careful examination of your figurine. If you find small chips or “flea-bites” these are impossible to fix economically – the figurine cannot be restored to its original condition and it will accordingly have a reduced value.
To repair or not repair?
If your figurine is chipped then the question of repair depends on the sentimental value that you attach to it. Read this post to learn whether or not a Swarovski crystal figurine is worth repairing.
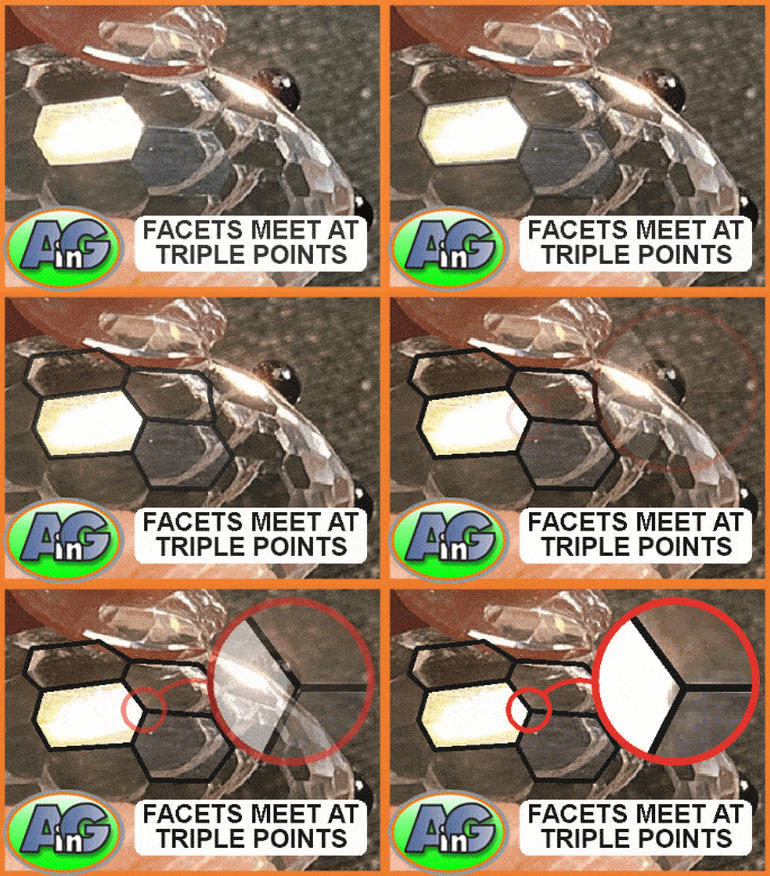
If you find chips (or “flea-bites) on the edges of the facets your figurine will have a much-reduced value.
Clean the figurine
Many vintage Swarovski figurines have accumulated layers of dust after years of neglect, so the first step is a thorough cleaning.
This post from Artistry in Glass explains, in detail, how to clean your Swarovski crystal figurine.
In summary:
- Minor surface dust – use a soft dusting brush
- Fingerprints – use a moistened Q-tip
- Serious dirt, or grease – consider soaking
The pointed, double-precision, tips on these cotton swabs help to access the intricate corners of your figurine – Available from Amazon – 4 packs of 200 pieces each
We use single-edge razor blades like these (available from Amazon) for removing old glue:
Having done a thorough examination and cleaning – we now explain the step-by-step process of restoration.
Note that Artistry in Glass is not affiliated in any way with the Swarovski company
How to re-attach the ear of a crystal mouse
Artistry in glass has years of experience in the repair of Swarovski crystal figurines – follow the expert steps outlined below:
Study the facets
Study the figurine in detail to figure out exactly where the ear needs to be re-attached. Mark the correct facet with tape or memorize its position before cleaning off the old glue.
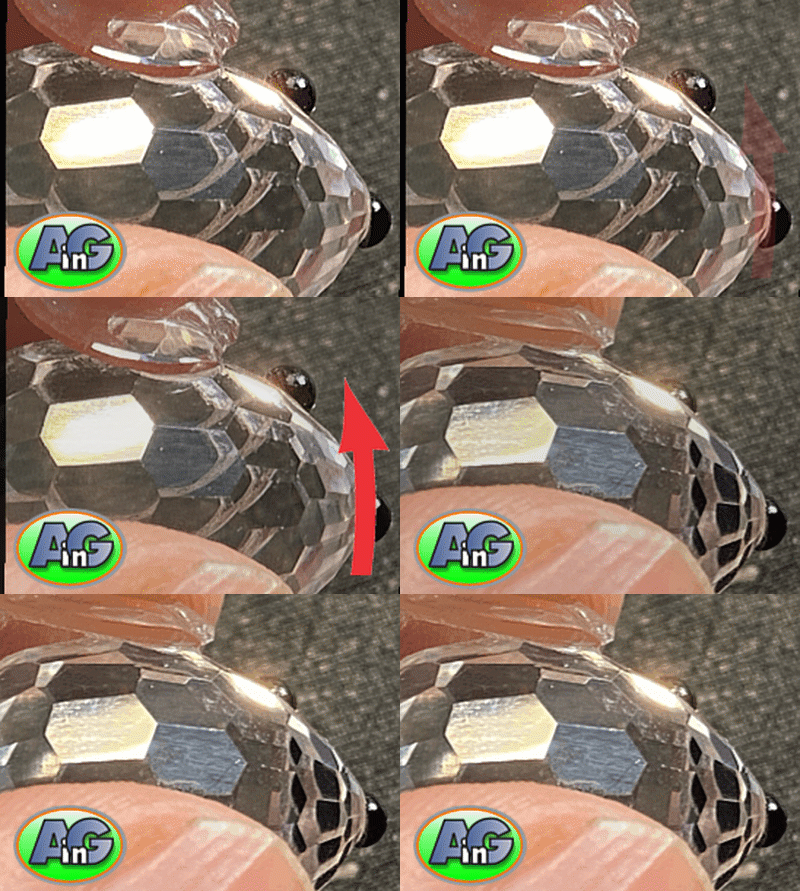
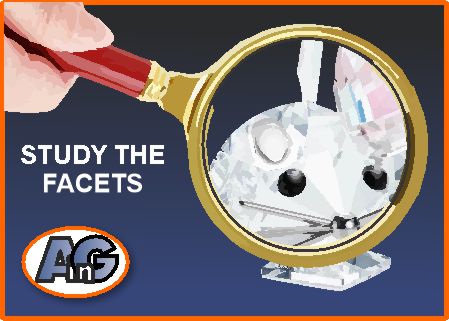
This step is important – It is very easy to glue the ear back in the wrong position!
Preparing to glue – cleaning
Thorough cleaning, before gluing is absolutely essential for a perfect repair. The recommended UV adhesives do not fill cracks – they need two perfectly planar (flat) surfaces to be effective.


We use single-edge razor blades, like these available on Amazon, to clean off the old glue. Use a little acetone or rubbing alcohol to lubricate the blade and take care not to scratch the crystal. Remember – memorize or mark the position of the old glue.
Gluing the ear
Now for the exciting and critical step – gluing the detached ear back into place.
The major advance in glue technology in the last 20 years has been the invention of UV-activated adhesives. Many brands are available – jump to this section on recommended UV adhesives for our best advice.


The big benefit of UV-activated glue is that it sets up almost immediately so you do not have to hold the piece in position for more than a few seconds. However, it is easy to position the ear incorrectly so we recommend using a nimble-fingered assistant to hold the ear in place while you shine the UV light onto the glue.
Setting up the glue
While your assistant holds the ear in place, shine the UV (blacklight) onto the glue. We like this lamp available from Amazon unless you decide to purchase the Bondic gluing kit (also recommended).

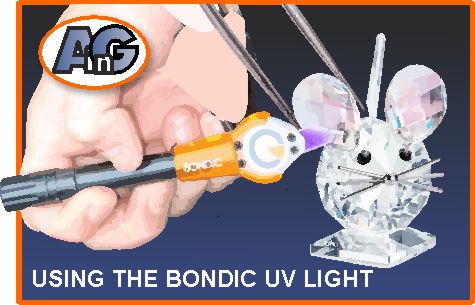
Shine the light as closely as possible to the repair – the closer the light the quicker the curing. If you do not have a UV light you can also use sunlight. In this case, shade the repair until you are confident that the positioning is OK, then smartly remove the shading to expose the glue to sunlight.
Work in an area with a cushioned surface under the repair. That way, if you slip or drop the loose piece it will not fall and break on a tiled floor.
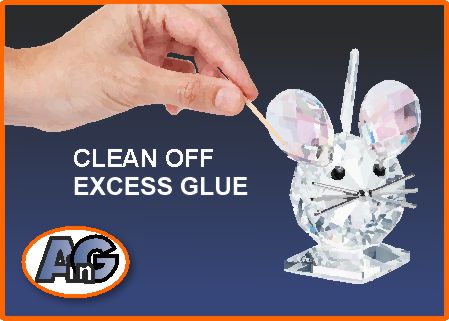
As soon as the glue has cured, use a fine Q-tip to remove any excess adhesive.
Congratulations – your figurine is as good as new!
If you have correctly positioned the crystal ear, the Swarovski crystal figurine should appear restored to its original condition. However, if you accidentally glued it in the wrong spot, you can detach it immediately using gentle force or a razor blade.
After removing the ear, follow the repair steps again, remove any excess glue, and restart the process. If you are satisfied with the outcome, expose the figurine to sunlight or continue shining the UV light for about 30 minutes. This will increase the adhesive’s strength as it cures.
UV-activated adhesives
In the past 20 years, significant progress in adhesive technology has transformed the process of bonding glass. Among the various innovations, the most notable one is the development of UV light-cured adhesives.
Contemporary UV-activated glues are transparent, durable, resistant to discoloration, and, importantly, cure rapidly. This quick setup time is particularly advantageous in the delicate task of positioning fragile crystal elements precisely.
In an upcoming post, we will detail our preferred UV glues. For now, here are our recommendations for fixing Swarovski crystal figurines:
Bondic UV liquid plastic welder
This inexpensive UV kit is very handy for the amateur wanted to fix one or two figurines. It combines a fine needle dispenser of glue with a built-in UV light. The small size makes it easy to use.
Refills are rather expensive but a single cartridge is sufficient to fix several crystal figurines. Although the adhesive is not as strong as the professional types (see below) it is plenty strong enough.
Professional UV-activated glue
If you plan to repair a lot of glass and crystal, we recommend using a professional-grade adhesive from CR Lawrence. This company’s adhesives come in three viscosities, high (thick), medium, and low (runny).
We prefer using the thickest (high viscosity) type of adhesive for most simple Swarovski repairs because it kind of “grips” loose crystals and keeps them in place for a few seconds before curing.
One of the significant advantages of the CRL range of adhesives is their high quality and reliability. Unlike many competing brands that arrive with dried-up glue, CRL adhesives come in black, light-resistant bottles.
To cure the CRL glue, you need to purchase a UV lamp such as the one recommended by Artistry in Glass on Amazon, or you can rely on sunlight.
It’s essential to note that these CRL adhesives will not harden when applied to the surface. Instead, they set up when applied to the minuscule gap between two pieces of crystal. This non-curing characteristic makes cleaning the surface a breeze with a Q-tip. (Innovative artisans can attain a glossy UV glue surface by placing a clear cellophane film over the glue before exposing it to UV light).
UV resin for filling gaps
The adhesives described will cure very slowly if applied to the surface of glass or crystal. They need to be enclosed between crystal or glass to set up correctly. If you need to fill gaps or create small crystal parts – there is a separate category of UV-activated clear resins that are very effective:
This is our recommended clear UV resin:
UV-activated clear resin sets up in sunlight to form a hard clear, glossy surface – useful for filling chips and creating missing parts.
How to repair Swarovski crystal figurines
Restoration of loose pieces from your precious figurines is not a complicated job but it needs a steady hand and good coordination. If you are not confident in your hand-eye coordination – bring your precious figurine into Artistry in Glass for expert repair.
Artistry in Glass was your source for antique repair in Tucson
Check out this amazing selection of informative articles:-
- Where can I get antiques repaired?
- Are broken antiques worth fixing?
- How to fix a broken picture frame
- How to repair a broken china plate
- How to repair a broken china teapot
- How to fix a broken marble slab
- How to repair a broken china coffee mug
- How to repair a 2000-year-old sculpture
- All about repairing stained-glass lampshades
- How to care for your stained glass skylight
- How to repair Dalle de Verre
- Is stained glass worth repairing?
- To repair or toss out?
- Tucson crystal & china repair a division of Artistry in Glass
- What to do with broken antiques
- Is lead crystal dangerous?
- Repairing an antique Mexican statue
- Repairing religious statues
- The history of Swarovski crystal figurines
- How to find the value of a Swarovski Crystal figurine
- Have Swarovski crystal figurines lost value since 2009?
- How to collect Swarovski annual ornaments
- How to display Swarovski crystal figurines
- How to authenticate a Swarovski crystal figurine
- How to display Swarovski annual ornaments
- How to clean Swarovski crystal figurines
- How to repair a Swarovski crystal mouse
- How to repair a Swarovski annual ornament
- How to repair a Swarovski crystal train set
- Fixing broken wine glass stems
- How to clean cloudy glasses
- Why do wine glasses have stems?
- Swarovski Crystal Figurines
- How to repair a chip in a wine glass
- How to fix a scratched glass tabletop
- How to replace a broken patio tabletop


